A key fundamental part of any eBook is the Table of Contents (TOC). This article also discusses creating an automated Table of Contents using Word.
NCX Table of Contents/Index
 Open any correctly formatted eBook and you’ll find in the menu a Table of Contents or Index. Listing each of the chapter headings, it gives the reader the ability to jump to any chapter or section, regardless of page size or page number (I’ll explain that in a bit more detail later). The Table of Contents file is generated by the conversion software utilised by Kindle, Lulu and Smashwords, as well as others. It’s called the Navigation Control XML (NCX) file, and works as an index of your eBook’s contents. So how does it work?
Headings
Headings are formatting tags, that instruct word processing software of the format of certain words; but are also picked up by automated eBook conversion software as section titles. So what is a section title? ‘Foreword’, ‘Chapter One’, ‘Appendix’, they’re all examples of a section title. We can read them as section titles, but to software they’re just words; just like the rest (well actually they’re just 1s and 0s, but that’s another lesson for another day). Assigning a heading format style to our section title tells the software ‘hey, listen up, this is a section title. It’s not like the rest, treat it differently.’
Assigning a Heading Format/Style
In Microsoft’s Word program, this is fairly straight forward; especially if you have the ‘ribbon’ at the top. You’ll need to find the ‘styles’ section, if you have the ribbon, it will look like this:
![]()
You will likely find that straight out of the box, or the first time you notice this section, that your headings aren’t labelled as they are in my example; don’t panic! You may also find you don’t have a ‘Heading 4’, or a ‘Copyright’, that’s OK, that’s normal. The reason I have these extra/different headings is simply because you can add/change/delete them to suit your style; I’ll cover that a bit more later too.
There is a simple key that, regardless of what you do to the styles, you must obey every time if you want consistent results!
The title of your book is always Heading 1. The section titles are always Heading 2 and any sub-titles are always Heading 3. Obey this golden rule, and you’ll find yourself getting more successful conversions when uploading your files.
So let’s look at that first step, the title of the book. In my example from Residuum of Ravenstone my book title is just as it’s written on the cover:
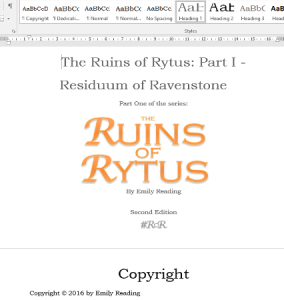
Note: The cursor is placed before ‘The’, it’s good practice to highlight the entire title before assigning the heading.
To assign the heading, highlight your book title and click ‘Heading 1’ in the styles ribbon.
But now my font has changed!!!!
Don’t panic! The quickest way to fix this is to undo the assignment of the heading (ctrl+z or the undo button). Format your title so it looks exactly how you want it to when your book is finished (don’t forget the limits of text font licencing for eBooks). Then update the style to match the selection. To do this, highlight your title and right click on the Heading 1 option in the styles ribbon, as shown in the Heading 2 example below:

You can do this for any heading, not just Heading 1 or 2. I highly recommend updating your heading styles to match your chosen font, before you assign your headings. Then, just as shown in the example, assign Heading 2 to your Section Titles.
You will need to assign the headings to every Section Title, including your copyright, dedication, appendix and chapters.
Previewing Headings in Word
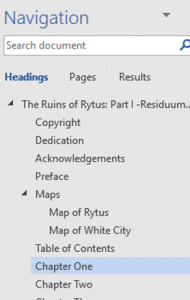
Wouldn’t it be a pain in the a** if you had to upload your eBook just to find out if all your headings were there? Well, luckily for us, we don’t need to do that. We can use the Navigation Pane. If you cannot see your navigation pane, click ‘View’ and check the box next to ‘Navigation Pane’.
With your headings assigned correctly, you will see a preview of the NCX file likely to be generated when you upload the document, as per my example:
Note: Make sure the option ‘Headings’ is selected just below the ‘Search document’ box.
If this Navigation Pane is not as you’d expect it to be, review your document. Any additional spaces, missing Section Titles or partial headings will need to be corrected manually.
The headings are stacked, which is also helpful, for example our Heading 1 is furthest left, with an arrow to close the next level of Headings:
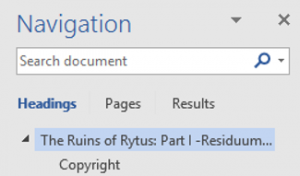
It is extremely important that the book title and nothing else is assigned as Heading 1. Anything else before it, or not under it, will not be included in the NCX file. Only assign Heading 1 as your book title, and make sure all other headings are below it (click the arrow, anything still showing other than the book title is not correctly assigned to another heading).
Often your NCX file will be generated to ‘ignore’ Heading 1, in the sense that your book title will not show on the contents list; forgetting it though will mean no Section Titles at all in your book. This is because most conversion programmes treat Heading 1 as the start line.
If you are creating a box set file, assign the overall box set name as Heading 1, for example ‘The Ruins of Rytus: The Complete Series’. Then assign the book titles within as Heading 2, and your Section Titles as Heading 3.
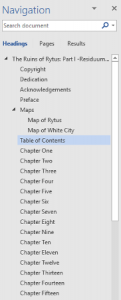
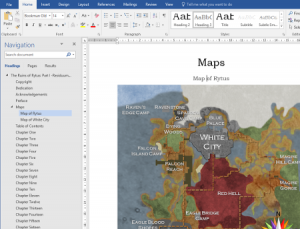
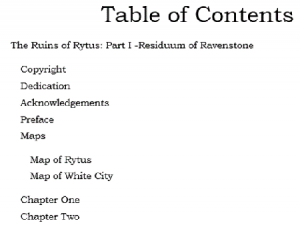
Heading 2 Section Titles will be shown indented from Heading 1:
Note: Map of Rytus and Map of White City are indented again under the title ‘Maps’. To achieve this, ‘Maps’ is assigned as Heading 2, while the individual maps are assigned as Heading 3. Table of contents is assigned as Heading 2, signalling the end of the ‘Maps’ section:
When the Navigation Pane correctly reflects all of your Section Titles, your work is done! It may take a little while to get everything exactly as you need it to be, but nailing this step will save you a lot of pain trying to upload your eBook. Stick at it and don’t be afraid to use that undo button – if you’re really nervous save a copy of your book under another file name and play with the headings until you’ve figured it out.
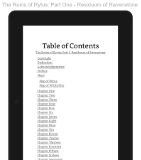
Creating an automated Table of Contents page for your eBook
It is commonplace, but not mandatory, to offer a ToC page within your eBook. Some readers find them easier to use than the built in menu created by the NCX file. Don’t worry though, all that hard work creating headings will now save us a great deal of work!
If you’ve skipped to this section to find out how to create a ToC, I’m afraid you’ll have to go back and read about Headings as they’re essential to this next step.
First things first, let’s insert an automated table:
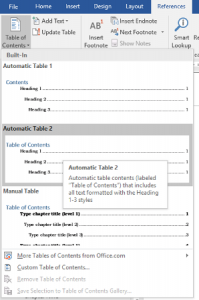
Word will kindly then generate an automatic table based on our headings:
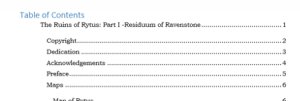
Why automated? For an eBook we need a ‘dynamic’ table, one that our readers can click on to travel to that Section Title (Chapter/Appendix/etc). This is only possible by linking our ToC with the Section Titles themselves. It is possible, with a great deal of patience, if you’re familiar with anchors and html to manually do this, but if you just glossed over at that sentence, I highly recommend you take the time to make your headings and use the automated ToC.
Removing the page numbers
This is essential for a professional eBook. Why? Well, phones, tablets and Kindle devices all display pages in different sizes (told you I’d get to this eventually). For example, you can fit a lot more text on a tablet screen than you can a smart phone, so the eReader will generate it’s own pages based on the chosen text size of our reader. If you don’t believe me, download the Kindle app (others are available) on to your phone and compare the pages to that of those on your tablet/Kindle. What might be page 10 on our PC screen is likely to be nearer 20 on our tablet, and nearer 50 on our phone. Therefore, the page numbers generated in our Word document will no longer be valid once converted.
There are two methods, 1 – manually removing each line. Pro – easier on the surface, Con – every time you update the table, the numbers will return.
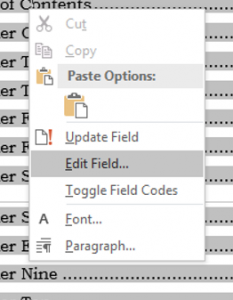
I personally opt for method 2. Now there may be a shorter route to the menu we need, but I haven’t found it yet (I usually forget how I found it last time, every time I need it – I had to remind myself just to write this article). Firstly, right click on any of the text in our automated ToC, and click ‘Edit Field…’:
This will bring up the ‘Field Properties’ box:
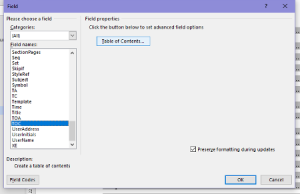
Under ‘Field names’ on the left, find ‘TOC’, select it, then click the ‘Table of Contents…’ button to open our TOC advanced options:
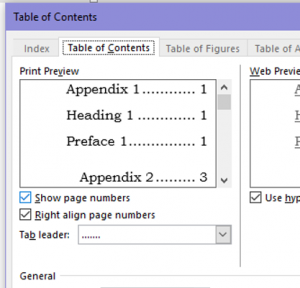
Untick the box ‘Show page numbers’. Click OK.
Don’t forget to update your Section Title ‘Table of Contents’ to Heading 2!
Confirming our automated ToC
This can also be a pain in the a** but worth it. On our finished ToC, hold down the control (Ctrl) button on the keyboard and click every link, to make sure it takes you were you expect it to go! If it doesn’t, there’s a chance your headings aren’t assigned correctly. Turn on the paragraph marker (as shown in Paperback Formatting – Sections Breaks) and check your heading tags are on the correct line, and not assigned on the previous page before a section/page break.
And you’re done!
Get uploading that eBook and good luck.


0 Comments